Coconut Cream Pie Recipe
Coconut Cream Pie is a timeless classic that never goes out of style. Its rich and creamy texture, combined with the delightful flavor of toasted coconut, makes it a dessert that’s hard to resist. In this article, we will take you on a journey through the creation of a Coconut Cream Pie that will impress your family and friends. So, grab your apron, and let’s get started!
Ingredients:
Before we dive into the detailed instructions, let’s take a look at the ingredients you’ll need to make the perfect Coconut Cream Pie.
| INGREDIENTS | QUANTITY |
|---|---|
| Sweetened Flaked Coconut | 1 cup |
| Half-and-Half | 3 cups |
| White Sugar | ¾ cup |
| All-Purpose Flour | ½ cup |
| Large Eggs, beaten | 2 |
| Salt | ¼ teaspoon |
| Vanilla Extract | 1 teaspoon |
| 9-inch Pie Shell, baked | 1 |
| Frozen Whipped Topping, thawed | 1 cup |
Now that we have our ingredients ready, let’s proceed to create this delectable dessert.
Instructions:
1. Toast the Coconut Flakes
A Golden Crunch
Begin by toasting the flaked coconut to add a delightful crunch to your Coconut Cream Pie.
In a skillet over medium heat, toast the flaked coconut, stirring constantly until it turns a beautiful golden brown. Once achieved, set it aside to cool. The toasty aroma will have your kitchen smelling heavenly.
2. Mix the Base
Creamy Goodness in the Making
In a saucepan, it’s time to combine the half-and-half, beaten eggs, sugar, flour, and a pinch of salt. Whisk them together to create a smooth mixture. Place the saucepan on medium-low heat, and remember to stir continuously to prevent sticking or burning. This step is crucial in achieving the perfect consistency for your pie filling.
3. Add Coconut and Vanilla
Elevate the Flavor
Once your mixture has thickened (this usually takes about 10 minutes), remove it from the heat. Now, stir in ¾ of the toasted coconut and the fragrant vanilla extract. The combination of coconut and vanilla will provide a symphony of flavors that will leave your taste buds dancing with joy.
4. Fill the Pie Shell
The Heart of the Pie
It’s time to pour the thickened mixture into your pre-baked pie shell. Allow it to cool slightly on the counter before placing it in the refrigerator. This cooling process is essential to set the filling, ensuring your pie maintains its shape when sliced.
5. Chill
Patience is a Virtue
Let your Coconut Cream Pie chill in the refrigerator for 2-4 hours, or until it’s perfectly set. This step builds anticipation as the flavors meld together, making every bite truly divine.
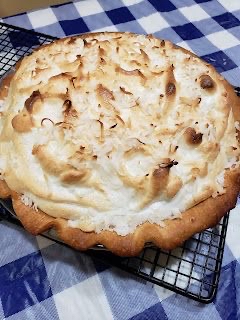
6. Final Touches
Aesthetically Pleasing
To complete your masterpiece, top your pie with the thawed whipped topping. This adds a delightful creamy finish. Don’t forget to sprinkle the remaining toasted coconut on top for garnish. It not only looks beautiful but adds an extra layer of texture to your dessert.
7. Serve and Relish
Enjoy the Fruits of Your Labor
Finally, it’s time to savor your creation. Slice up your Coconut Cream Pie, serve, and watch as the slices disappear. The combination of the toasty coconut, creamy filling, and fluffiness of the whipped topping will leave your guests asking for seconds.