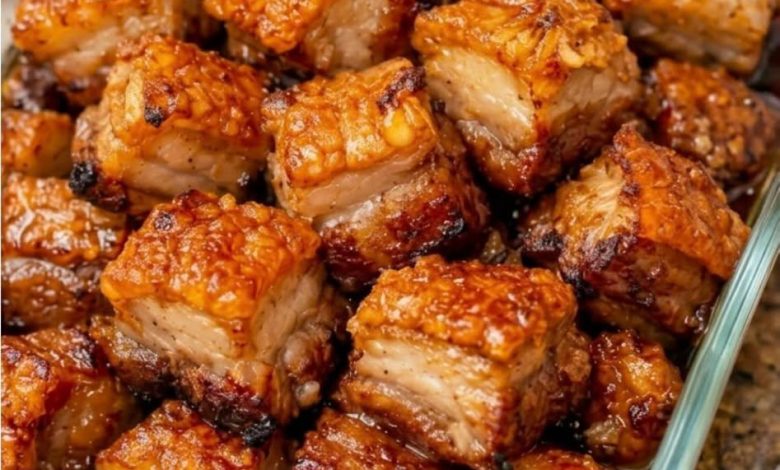
Crispy Pork Belly Bites
There is a very specific kind of magic in that very first bite of perfectly crispy pork. You know the one: the way it audibly shatters between your teeth, followed immediately by the rich, savory, melt-in-your-mouth tenderness of the meat inside. It’s the kind of flavor and texture that makes you close your eyes and just savor the moment.
If you’ve ever ordered crispy pork belly at a fancy restaurant and thought, “I could never make this at home,” I am here to tell you that you absolutely can. In fact, this oven-baked method is so incredibly easy and hands-off, it’s practically foolproof. It’s the ultimate “fake it till you make it” dish. It looks and tastes like you spent hours tending to it over a hot fryer, but your oven does 100% of the work.
Whether you’re hosting a casual get-together, looking for a show-stopping appetizer to pair with a nice glass of wine, or just want to treat yourself to something deeply comforting and indulgent, these bites are about to become your new obsession. Grab your favorite beverage, and let’s get cooking!
The Science Behind the Perfect Crunch
As someone who truly appreciates the science behind good cooking, I have to share the secret to this recipe. It all comes down to two things: moisture control and a little chemical magic.
First, moisture is the enemy of crispiness. By patting the pork completely dry and letting it sit uncovered in the fridge, we dry out the surface. Second, we use a tiny bit of baking powder. I’m not talking about baking soda—baking powder is slightly alkaline. When it hits the heat, it raises the pH level on the surface of the meat, which breaks down the proteins slightly and allows them to brown and crisp up beautifully without burning. Combine that with a two-stage baking method (low heat to melt the fat, high heat to crisp the outside), and you get a golden, shatteringly crisp crust every single time.
Ingredients You’ll Need
The beauty of this recipe is that it relies on a short list of pantry staples. Here is what you need to gather.
The Star:
- 1.5 lbs pork belly: Ask your butcher to cut it into 1-inch cubes, or slice it into cubes yourself. Tip: Skinless pork belly is much easier to eat as a bite-sized appetizer, but if you prefer the traditional crackling, you can use skin-on!
The “Magic Dust” Seasoning:
-
- 1 teaspoon baking powder: Crucial note: Make sure it is baking POWDER, not baking soda. Also, ensure it is aluminum-free so it doesn’t leave a metallic taste.
- 1 teaspoon kosher salt: Enhances the natural savory flavor of the pork.
- 1 teaspoon garlic powder: For that essential savory backbone.
- 1 teaspoon smoked paprika: Adds a gorgeous golden color and a subtle, comforting wood-smoke flavor. Substitute: Regular paprika or a pinch of cayenne if you like some heat.
- ½ teaspoon black pepper: Freshly cracked is best.
Step-by-Step Instructions
Let’s get those bites crispy! I promise this process is incredibly relaxing and straightforward.
1. Prep and Dry the Pork
Take your pork belly cubes and pat them completely dry with paper towels. This is a non-negotiable step! Moisture on the surface will steam the meat instead of crisping it. Place the dried cubes on a wire rack set over a baking sheet and leave them uncovered in the fridge for at least 2 hours, or preferably overnight.
2. Coat with the Magic Dust
When you’re ready to cook, take the pork out of the fridge. In a small bowl, whisk together the baking powder, kosher salt, garlic powder, smoked paprika, and black pepper. Sprinkle this seasoning evenly over the pork cubes. Toss them gently with your hands or a spatula until every single piece is lightly and evenly coated.
3. The Slow Render (Stage One)
Preheat your oven to 300°F (150°C). Place the wire rack with the pork belly cubes back over your baking sheet (line the sheet with foil for easy cleanup!). Bake for 45 minutes. This low-and-slow stage gently renders (melts) the heavy fat inside the pork belly, making the inside incredibly tender without drying it out.
4. The High-Heat Crisp (Stage Two)
After 45 minutes, take the pan out and carefully turn the oven temperature up to 450°F (230°C). Once the oven is fully preheated, put the pork back in for another 15 to 20 minutes. Keep a close eye on them during the last 5 minutes! You are looking for the edges to turn a deep, mahogany brown and the fat to look bubbly and crisp.
5. Rest and Serve
Remove the bites from the oven and let them rest on the wire rack for about 5 minutes. This allows the juices to redistribute and the crust to set up and become even crunchier. Serve them warm!
Pro Tips, Variations & Serving Ideas
Quick Tips for Success
- Use a Wire Rack: Baking the pork on a wire rack allows the hot air to circulate all the way around the meat. If you bake them directly on a flat pan, the bottom side will steam in the rendered fat and get soggy.
- Don’t Skip the Fridge Time: If you don’t have time to leave them in the fridge overnight, even just 30 minutes uncovered in the fridge makes a noticeable difference in the final crunch.
Fun Variations
- Sweet and Spicy Glaze: Toss the hot, crispy bites in a mixture of 2 tablespoons honey, 1 tablespoon soy sauce, and a dash of sriracha right before serving.
- Southern BBQ Style: Swap the smoked paprika and garlic for your favorite dry BBQ rub for a comforting, backyard barbecue flavor profile.
How to Serve Them (The Interactive Appetizer Bar!)
I love setting up a little interactive dipping station for these. Arrange the hot pork belly bites on a rustic wooden board and surround them with small jars of different dipping sauces. Offer a classic honey mustard, a spicy mayo, and a sweet chili sauce. Provide some toothpicks so guests can easily grab a bite and dip it.
To make it a truly special gathering, pair these rich, savory bites with a crisp, chilled white wine like a Sauvignon Blanc, a sparkling wine, or a light, cold beer. The acidity and bubbles cut right through the richness of the pork, creating a perfectly balanced bite!
Frequently Asked Questions
Q: Can I make these in an air fryer? A: Absolutely! The air fryer is fantastic for this. Cook them at 300°F for 15 minutes to render the fat, then bump the heat to 400°F for 8-10 minutes to crisp them up. Just make sure not to overcrowd the basket.
Q: Why did my pork belly turn out chewy instead of crispy? A: This usually happens if the oven wasn’t hot enough during the second stage, or if the pork was crowded on the pan. Make sure you use a wire rack, let the oven fully preheat to 450°F for the second stage, and give the pieces plenty of breathing room.
Q: How do I store and reheat leftovers? A: Store any leftovers in an airtight container in the fridge for up to 3 days. To reheat, never use the microwave, or they will turn rubbery. Instead, reheat them in a 375°F oven or an air fryer for 5-7 minutes until they are hot and the crust has re-crisped.
Let’s Enjoy Some Comforting Food!
I truly hope these Crispy Pork Belly Bites bring a little extra joy, crunch, and indulgence to your kitchen. There is something so deeply satisfying about creating a restaurant-quality appetizer right at home, especially when it’s this effortless and hands-off. It’s all about treating yourself and your loved ones to something special without spending hours over a hot stove.
If you try this recipe, I would absolutely love to hear how it turned out for you! Did you stick to the classic smoky rub, or did you toss them in a sweet and spicy glaze? Drop a comment below to let me know, and please share this recipe with a friend who loves a good, crispy appetizer. Happy cooking, and I’ll see you in the kitchen!